My Weekly Workspace allows you to plan and organize your workweek directly in the Twproject Weekly Agenda. You can view assigned ToDos, schedule them across different time slots, create new tasks, and add Work Plans to indicate how much time you intend to dedicate to a project.
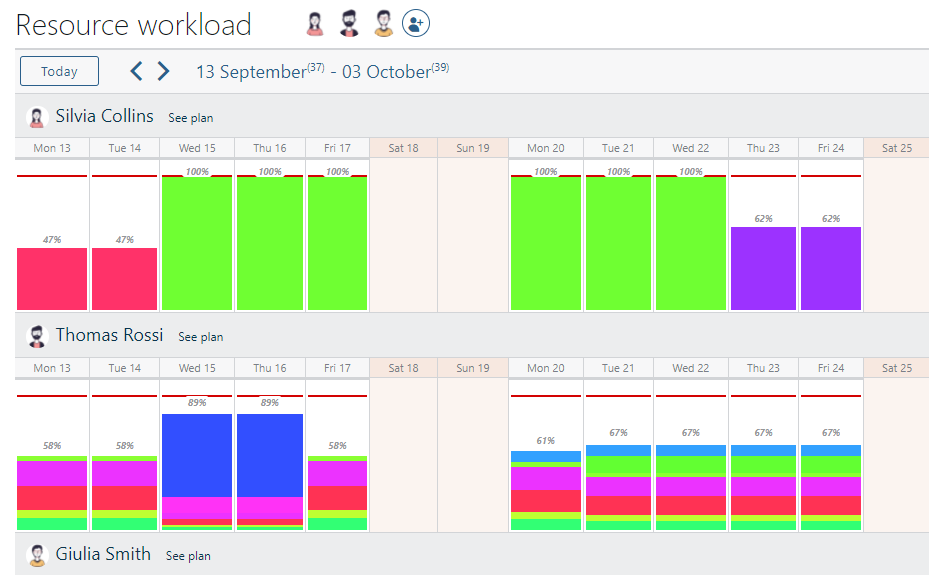
Scheduled activities contribute to the resource workload overview, providing a more comprehensive view of weekly commitments
Want to learn more?
– Video tutorial: for a quick, practical explanation
The step-by-step instructions are provided below.
Enabling My Weekly Workspace
To display scheduled activities in the Agenda:
- Open the Weekly Agenda.
- Open Options by clicking the gear icon.
- Select Show planned activities.
Once this option is enabled, you can organize activities directly in the weekly view.
Scheduling ToDos without a date
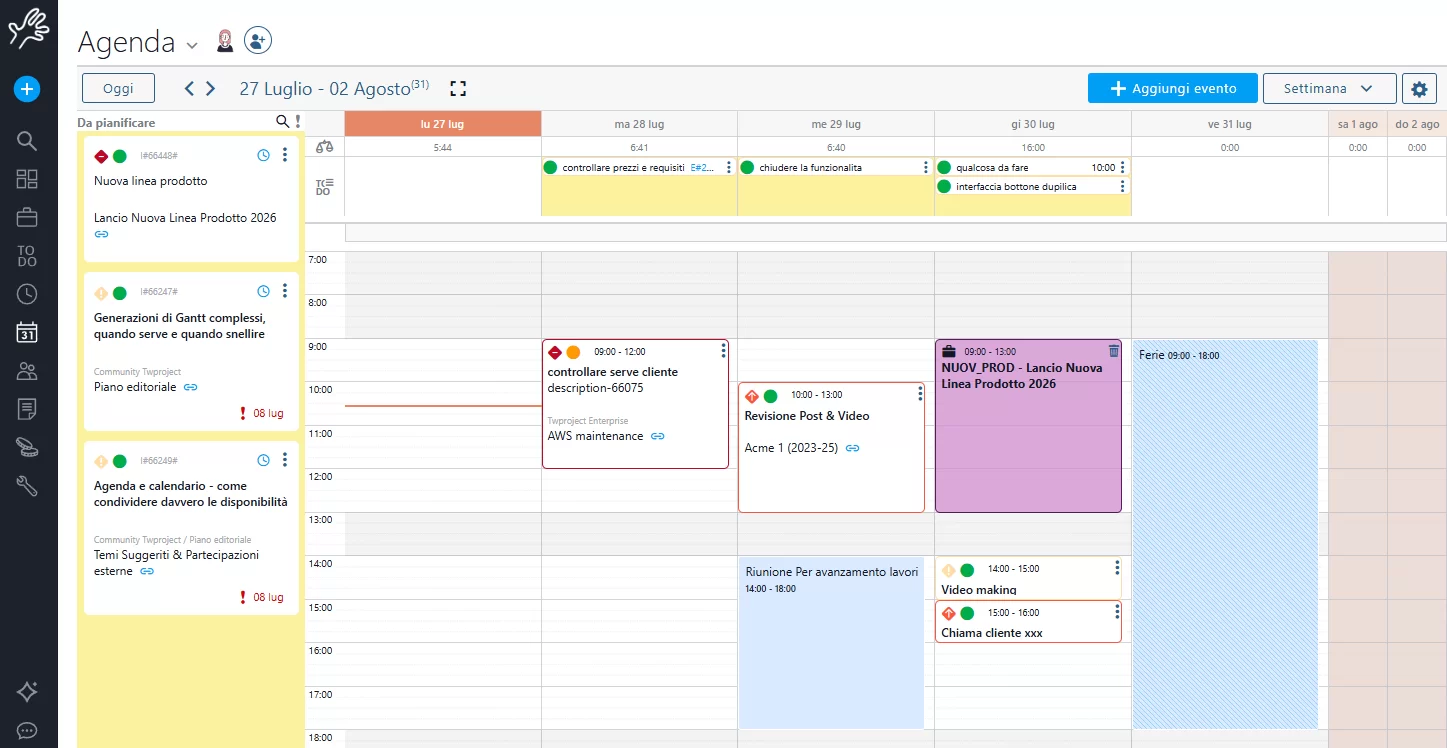
Assigned ToDos that do not have a specific date are displayed in a dedicated column on the left side of the Agenda.
To schedule a ToDo:
– Locate the ToDo in the side column.
– Drag it to the desired day and time slot.
– Set the duration of the activity.
The ToDo will then be added to your weekly schedule. If priorities change, you can easily move it to another day. This flexibility allows you to adjust your workload in real time without leaving the Agenda or accessing other sections.
Editing ToDos with an assigned date
ToDos that already have an assigned date are displayed at the top of the Agenda, above the corresponding day.
You can adjust their schedule directly from the Agenda:
– Move a ToDo: drag it to the desired time slot.
– Change the duration: resize the activity to increase or decrease the scheduled time.
– Change the day: drag it to the day on which you intend to work on it.
This allows you to update the distribution of activities based on changing priorities and weekly commitments.
Create a new ToDo from the Agenda
You can create a new personal ToDo directly while planning your week.
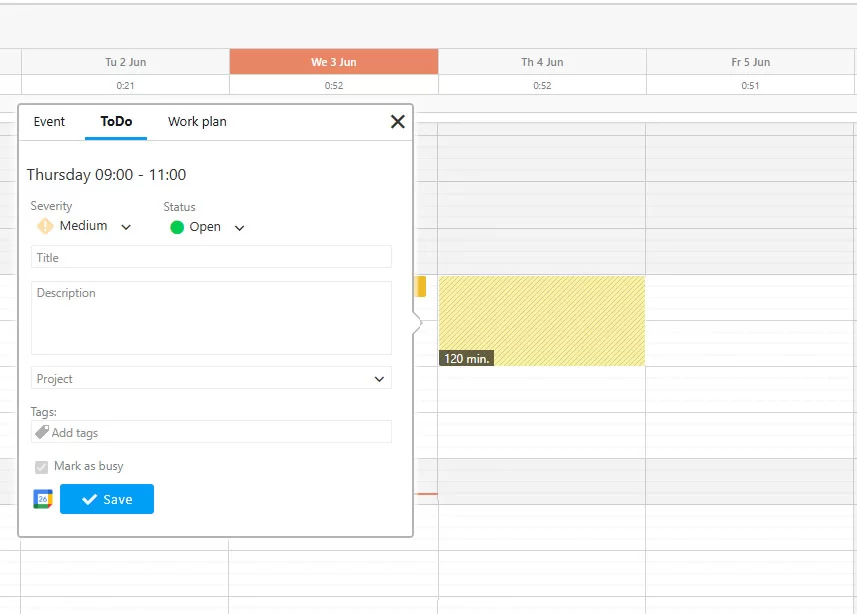
1. In the Agenda, drag the cursor across the time slot you want to reserve for the activity.
2. In the entry window, select the ToDo tab.
3. Fill in the required fields and, if necessary, provide additional information such as description, priority, project, and tags.
4. Complete the creation process.
The new ToDo will be created based on the selected time slot.
Creating a Work Plan
Work Plans allow you to schedule a time slot dedicated to a project, even when it is not associated with a specific ToDo.
To create a Work Plan:
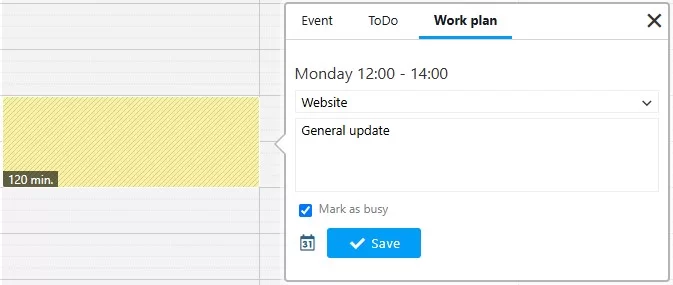
1. In the Agenda, drag the cursor across the time slot you want to reserve.
2. In the entry window, select Work Plan, if available among the options.
3. Enter the description and the required information.
4. Confirm the entry.
The Work Plan will appear in the Agenda, indicating the time reserved for work on the project.
Marking an Activity as Busy
When creating or configuring a ToDo or a Work Plan, you can use the Mark as busy option.
When enabled, the time slot is marked as busy in the Agenda viewed by other users, helping to prevent scheduling conflicts with other commitments.
If the ToDo or Work Plan is linked to an external calendar, such as Google Calendar or Outlook, the event can be exported to the connected calendar, and the resource is marked as busy according to the integration settings.
For more information, see the documentation on synchronization with external calendars.
Impact on Resource Workload
Activities scheduled in the Agenda contribute to the resource workload overview.
This makes it possible to account for commitments throughout the week and gain a more up-to-date view of people’s availability.
For more information, see the relevant page in the user guide: Resource workload.