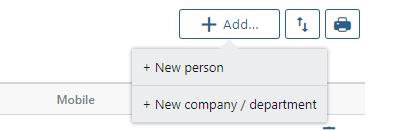
By clicking on the “resources” button on the bar you will see your colleagues (if any) and the button to create a “+ Person” and “+Company / department”
You can watch this video, which explains easily how to create your team, or follow the instructions below.
When you see “my colleagues” as title, it means that the resources shown are filtered: Twproject shows you the resources that belong to the same company as you do. It is not by default showing all resources you can see, as this may be a large selection. In order to change what is shown, click on the small arrow near the title.
Why two buttons? Because Twproject manages both users and companies.
Person can log-in (if login enabled), companies cannot.
A company can contain several other companies and users.
For instance a “company” can have several “department” each with several “offices” and finally every office could contain several “person”.
You can create your organization charts in detail using companies, departments and person.
Both person and company can be “assigned” to a project.
Let’s start by creating a new user: press the “new person” button:
In order to create a resource you must have permission to do so, so to keep it easy for the moment we’ll assume that you are a super powered “administrator” (which is the default after setup).
The form allows specifying all main data for a person as name (or first name), surname (or last name), e-mail addresses etc. that are common in a basic directory management. If you think this is enough just press save and your first resource will be created. Only the surname field is mandatory.
The code field is not mandatory and it is not unique.
Each mandatory field is prefixed by *. You cannot save a form without filling each mandatory field, in case you try to do so, the field will be enhanced as shown:and the action stopped.
Let’s now examine a form with data inserted:
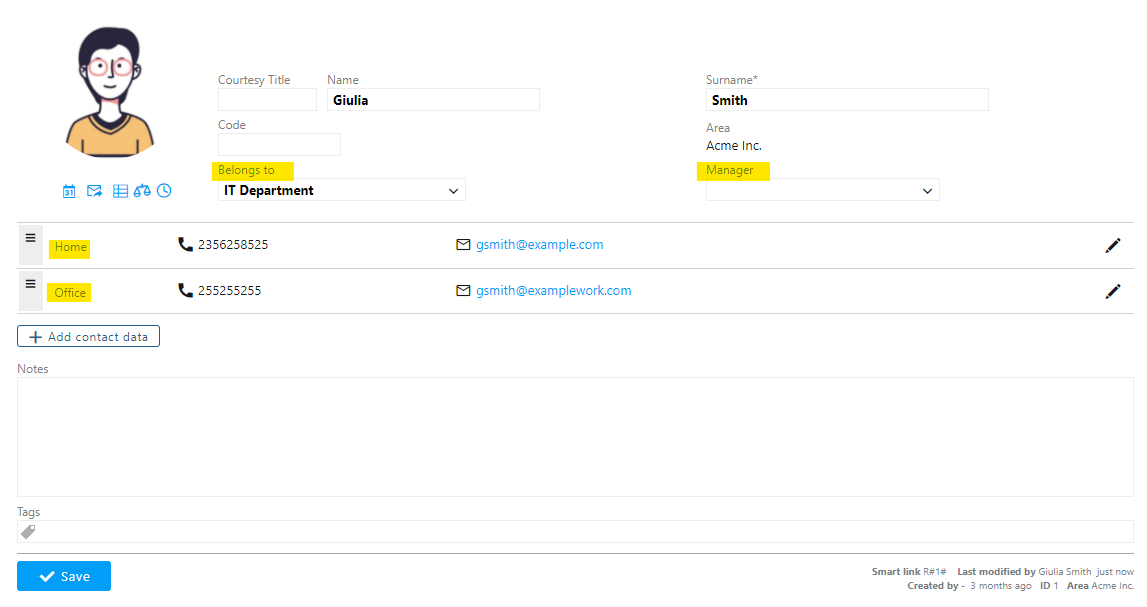
Notice the three highlighted areas:
Belongs to
This means that “Giulia Smith” is part of the “IT department”. The department belongs to Acme Inc. company. This is how Twproject constitutes an organigram, as a tree.
Manager
by specifying the manager you will keep track of resources’ hierarchy
Adresses
Twproject can record more than one personal data. In this box you will see the list of locations
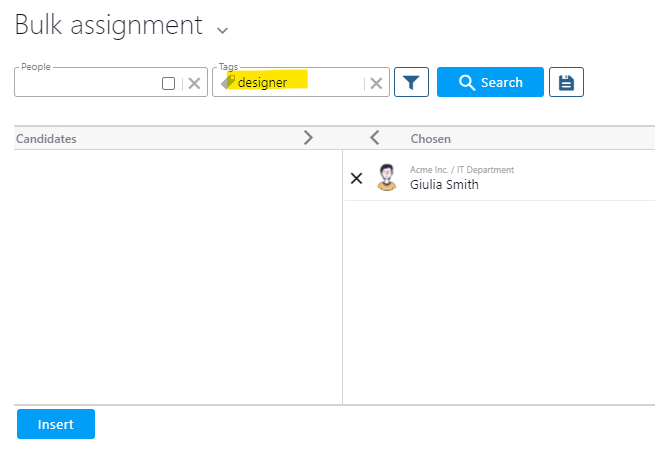
A resource can be also tagged. Using tags for skills let you create groups to bulk assign and search for specific skills, for example to find the one less loaded.
It’s probably easy to guess the meaning of the other fields. Notice only the “area” combo that allows setting your resource’ security environment. For the moment we are setting up a simple mono-area environment.
Notice the R#1# which is a resource unique code that allows to link to it from any text in Twproject .
A last note before moving to the security/login view, about the sidebar: when you are creating a resource, buttons change:
Creating, editing a resource without login and editing a resource with login – has options
The other buttons will be active once saved.
You can watch the video tutorial
Resource Work Settings
For your resources you can specify work hours per day. In work settings tab you can insert start time, end time and break. This data will be considered by the operator load to calculate resource load.
To enable Saturday and Sundays you have to enable them for the entire installation in the administration page and the you have to turn it off to those not working in the week end.
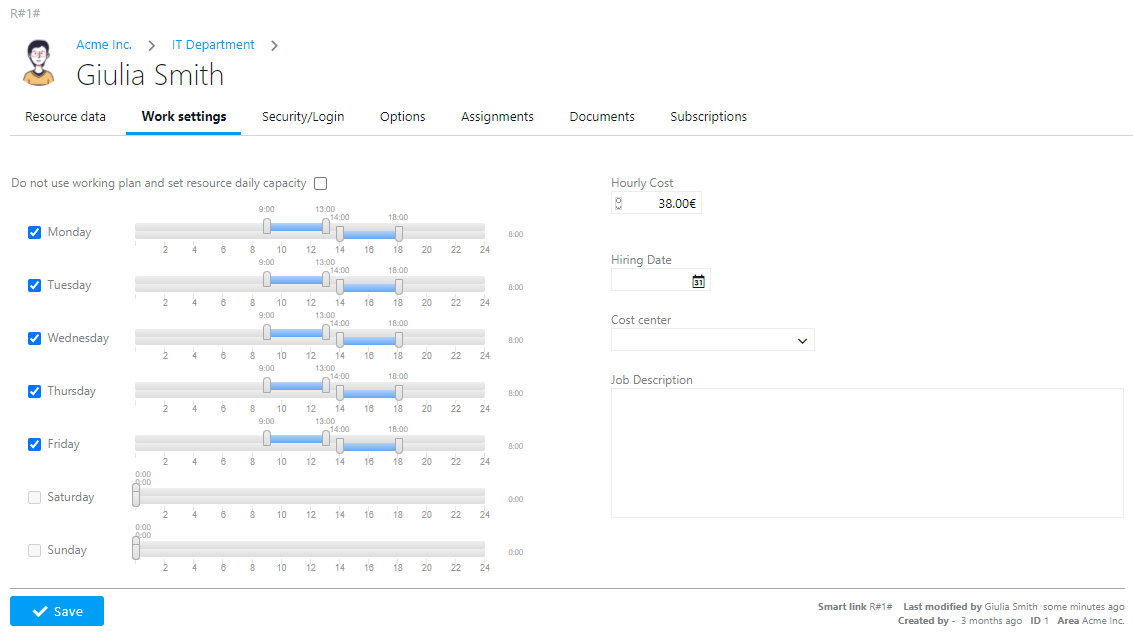
It is also possible to set work settings on departments so that users inherit it. In case of flexible work you can just set how many hours the resource needs to work.
Twproject’ resources with login: users
Using Twproject you can add and then manage every resource involved in your projects. You can decide to use resource management lightly or in depth by specifying less or more data. If you decide to use it in depth, Twproject will also keep your contact list, or even your organizational charts .
Basically a resource is defined by its name and that’s it, but if you want the resource to be operating in Twproject, you have at least to define a login name (and a password).
Let’s see how to create a new resource by using the “resource editor”.
If you define a login name and a password, the generic resource becomes a Twproject’ user and then can login and operate in Twproject.
You may assign resources to projects and ToDo even if they don’t have a login.
Let’s show the “security/login” tab:
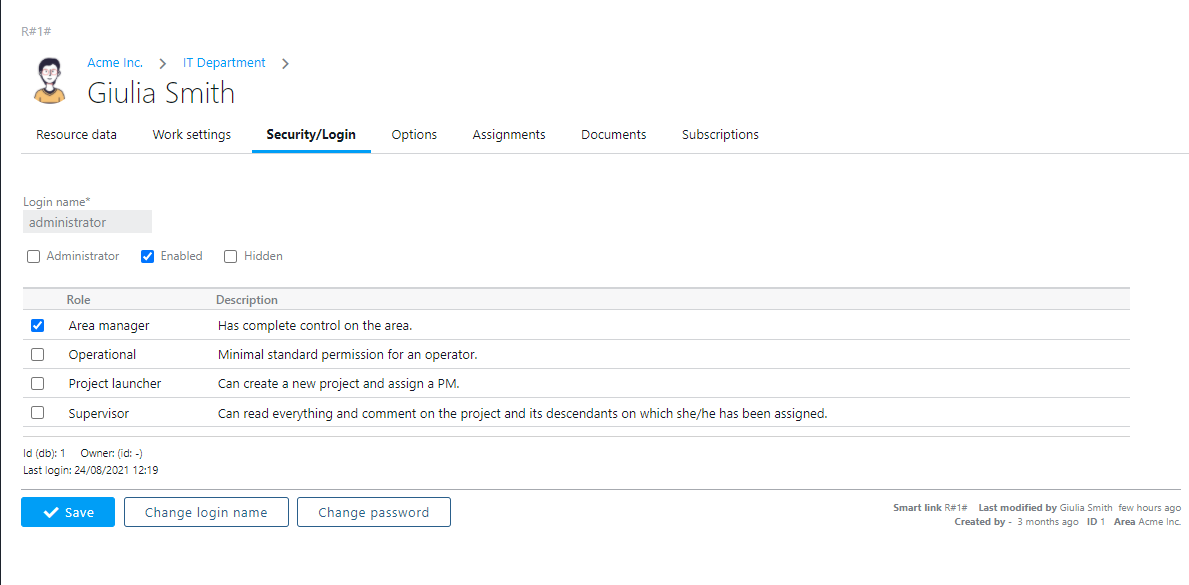
Login name must be unique. Once the password is set, at first login, the user needs to reset it.
A user can be hidden (administrators only can see it) and/or disabled (cannot login anymore). When a user is disabled all data inserted or related to the user is preserved. You can re-enable disabled users when needed.
In the highlighted box above you can choose one or more “global roles”. In the first usage “easy mode” you should check “Operational” on every user you create; this is a role created by default during installation, that provides the minimal set of permissions required to operate comfortably; or you could even more roughly set every user as “administrator” and bypass security in the beginning.
You can define as many global roles as you need but if you want to use the Twproject’ security in deep, see Security.
If you have a special security policy regarding password length or expiration times, see Twproject security. If you want to use your LDAP/ Active directory to import/authenticate user see LDAP/Active Directory.
Passwords are not recoverable from the database, so there is no way to recover a forgotten password; eventually, just reset it.
Disabled users are not counted in the license total; so if you have 10 active users and 50 disabled ones (e.g.: temporary employees for specific projects than do not currently work with you), you only need a 10 user license.

When you are creating a new resource (actually this works for every important entity) the button bar reports the current status of the object:

When the object is already saved the status appears slightly different by reporting creation and last change dates:
How do I access my own profile? Just click on the image icon at the bottom of left menu.
Every operator can customize Twproject’ behavior. Let’s have a look at the “options” tab:

Every user can customize her/his Twproject experience by setting image, interface language, her default home page, default color of notes from myself, etc.
Some of this data is relevant for Twproject’s management and we will meet it again later.
If you are surprised that there are both English and American as language options, this is because in addition to the interface language with this you set the default format for dates, which are different in these two countries.
The “subscriptions” tab shows all the subscription created according to your assignments. Every time you assigned to a project/phase, according to the role, you will be subscribed to some events to be notified. Twproject has an event based subscription engine, so you can be subscribed to listen to a specific event. Subscriptions can be modified by the user and refined.
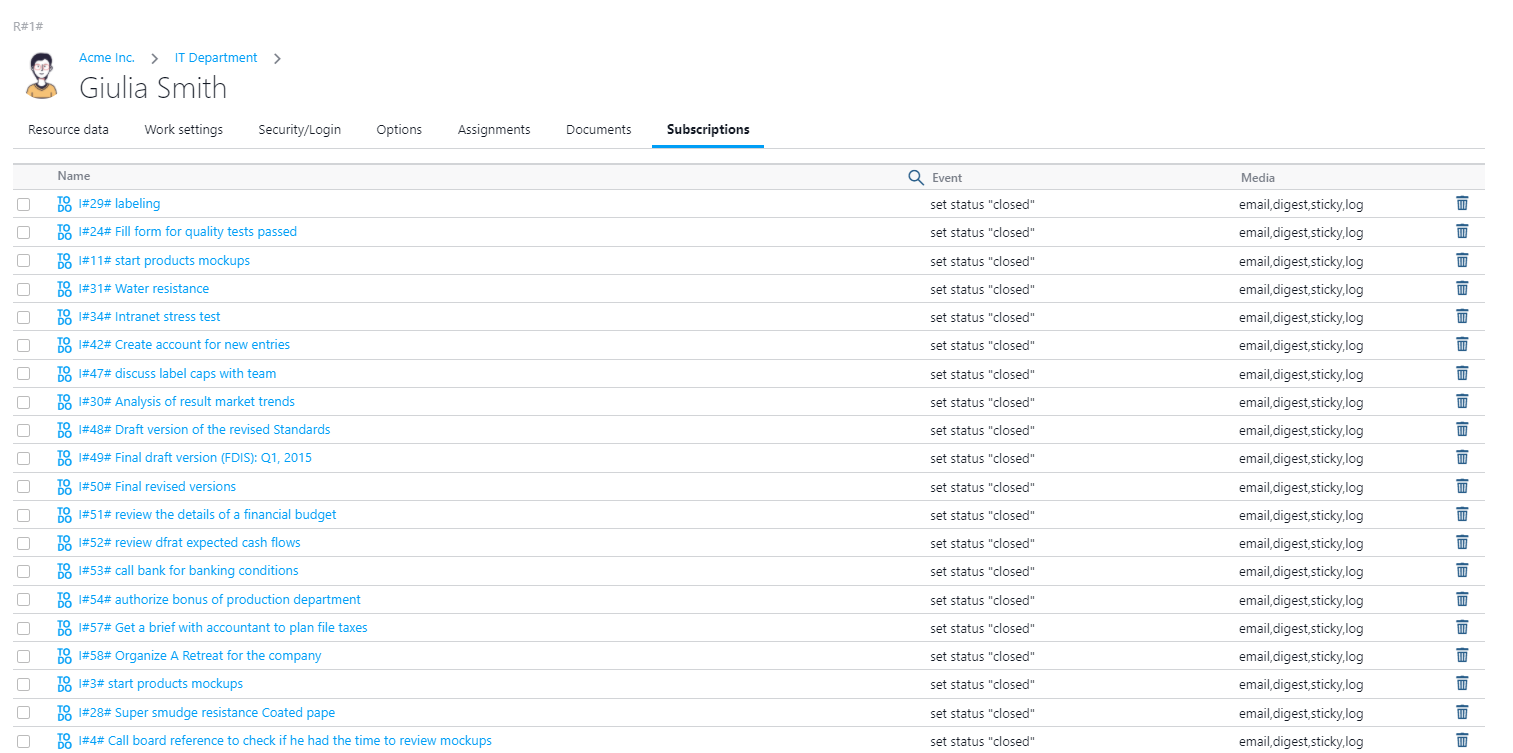
You can also remove subscriptions and all of them with the “remove all subscriptions” button.
Assignments tab shows all resource assignments with estimations and work done, planned work and ToDos.
Documents tab shows associated documents.
Company / Department
Companies and departments are both created using the “create company” button setting then a different resource type.
You can create a company with many departments and each department can contain as many resources (resources that can be persons or companies or departments); by structuring your company you get your organization chart and some other nice features, like team, that will be described in the following.
Take a look at a company with data fulfilled:
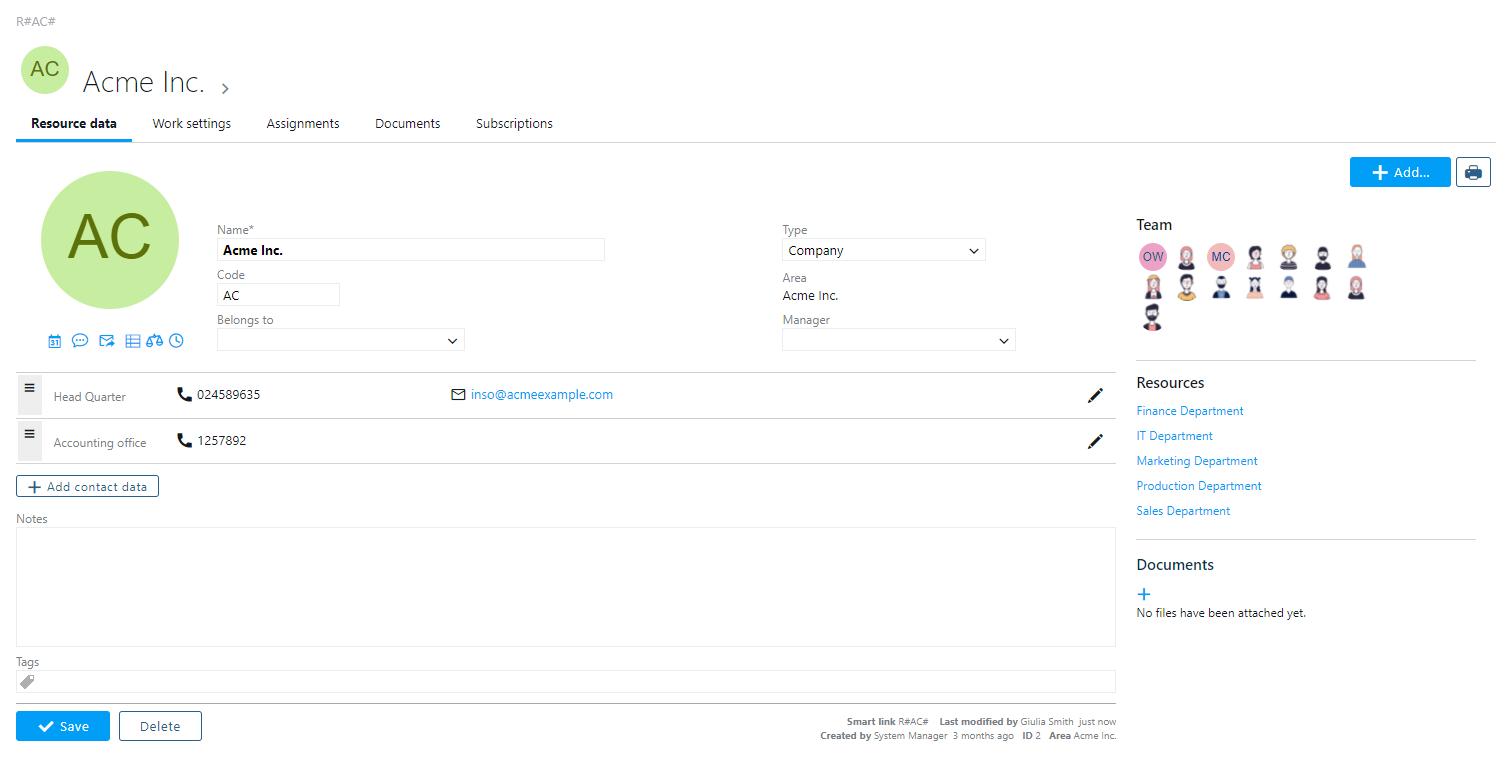
The form is similar to the “person” one, and on the sidebar you get the list of connected resources, list that contains both persons and departments.
An easy way to move across the tree is to use the top navigation bar by “stopping the mouse on” or clicking the down arrow:
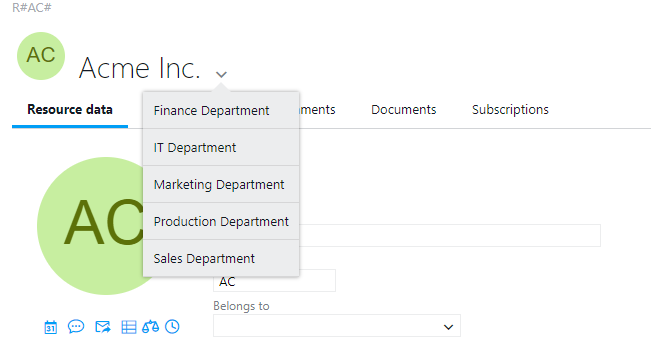
The navigation bar is present whenever the entity is a tree (resources or projects)
If you want to link directly to a resource via a URL, use:
http://[your root]/resource/X
where X is the code or the ID of the resource.
Team
The organization chart with the related departments and managers creates what in Twproject is called team or staff.
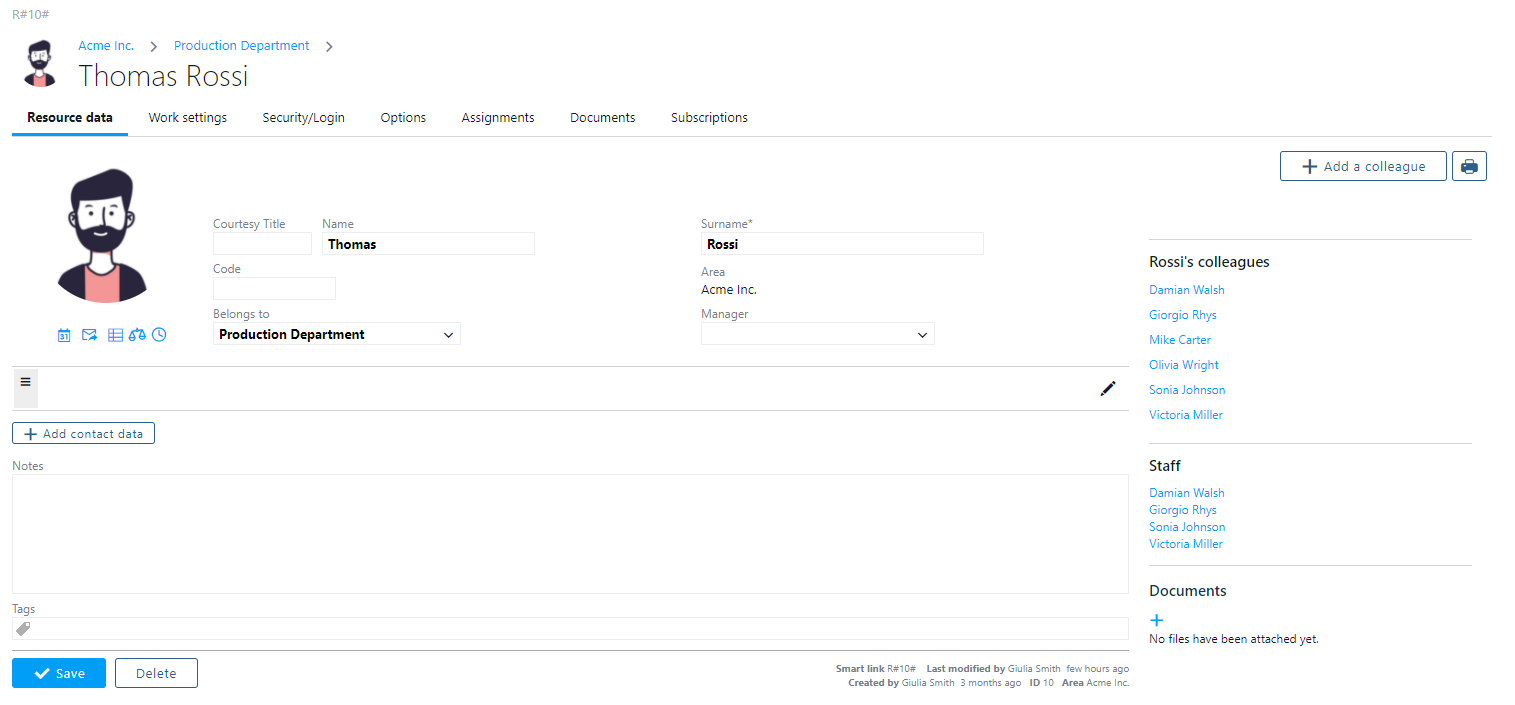
In this case you see on the top right Thomas colleagues (person in the same department) and those that Thomas manages in the staff.
This group is important in relation to the creation of assignments. Being the manager of a team, Thomas has special rights on this resources, for assigning them, checking worklog, capacity. This special behavior is defined in role “Manager” (admin -> roles).