The idea behind custom forms, also called plugins, is that you can add a form with an arbitrary number of fields. The form can be associated with projects, resources, or even appearing generically in the Twproject menu, depending on the context and user permissions. This is simply done by creating a single jsp file.
No need to compile classes or modify the database schema, no matter how many new fields you wish to insert!
In fact, the main feature of such components is that they allow the properties of a project to be extended without having to deal with the display/saving/editing/deleting of data. These aspects are entirely managed by the Twproject framework and thus completely transparent to the user.
Whereas forms are used to extend the properties of Twproject objects according to one’s own needs, plugins are usually intended for automated actions (e.g. wizards) or to extend the capacity of reports.
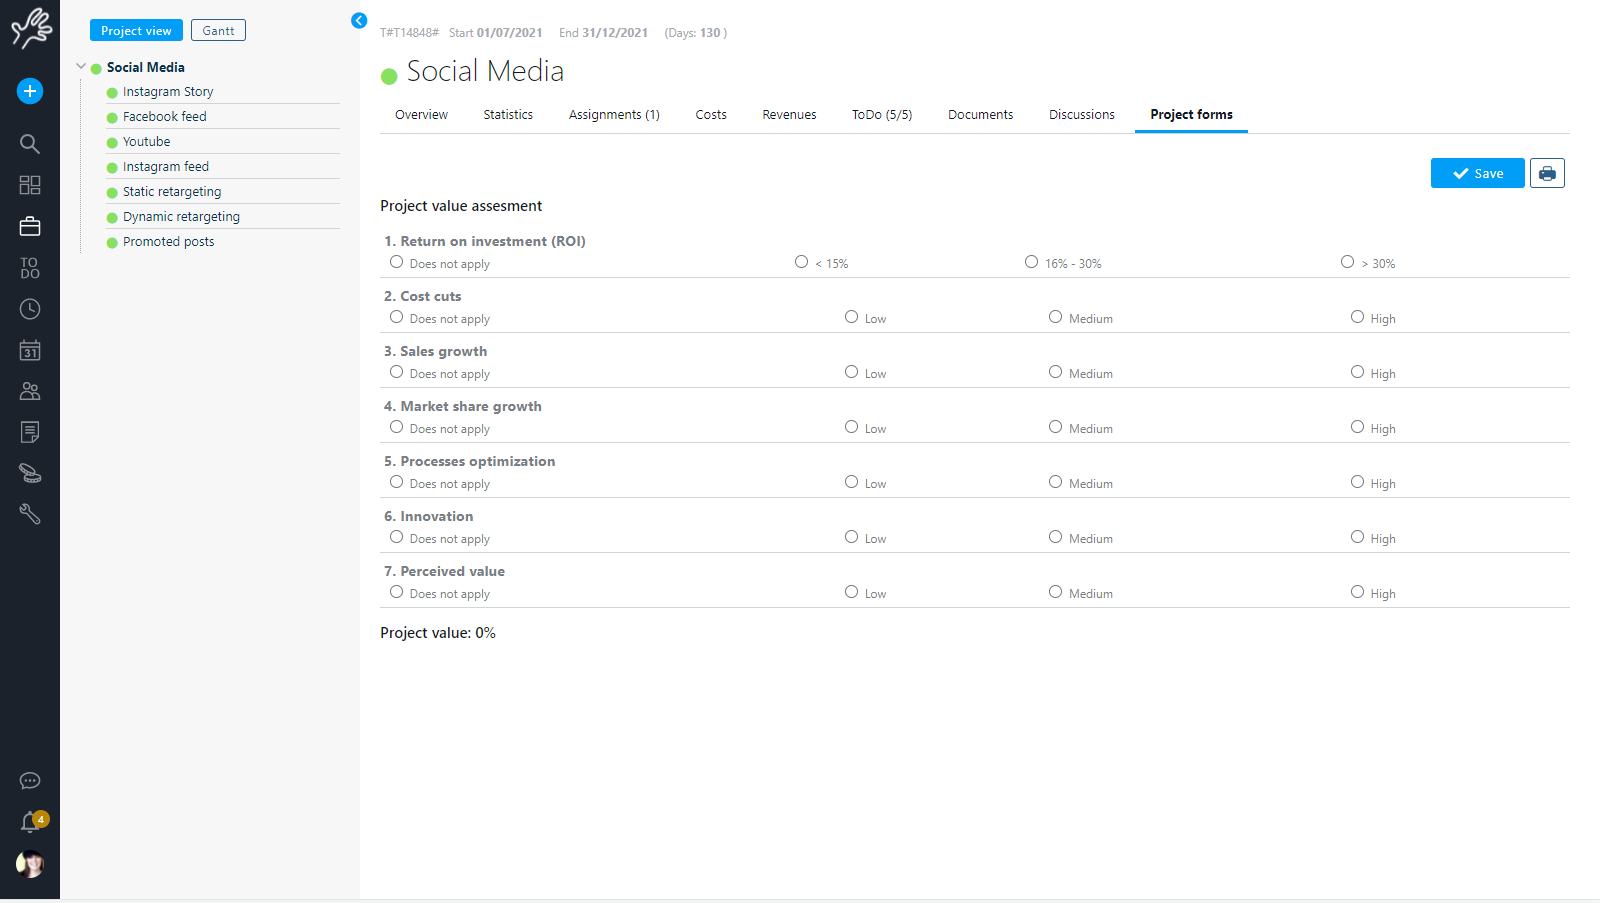
Forms are displayed as tabs on the main project and resource page and, from version 7.1.009 of Twproject, they are also integrated into the Gantt chart view of the project.
Use of customised forms
In the standard installation of Twproject there already are some examples of project and resource forms. The form for calculating relevance, complexity and project risk is an example from which you can draw inspiration for your own customisation!
To see the list, in the project tab, click on the forms tab (if the conditions for displaying them are met).

Other examples only appear when a project or company type resource is called “Twproject test form“.
Create your form
Please note: this section requires some Java programming skills.
Forms/reports/plugins only make sense if they are “customised” according to one’s needs, so in this section we will explain how they work and how to write new ones.
This section is aimed at those with some programming skills, knowledge that is essential for creating forms from one of the examples provided without excessive difficulty.
Custom forms are files with a “.jsp” (Java Servlet Pages) extension that are stored in specific folders on the server where the application has been installed, in particular
– the default ones are in the folder:
[root]/applications/teamwork/plugins
– the customised ones, on the other hand, in order to be loaded by Twproject, must be placed in the folder:
[root]/applications/teamwork/customers/ACME/plugins
Where ACME is the name/short code of your company.
When Twproject’s service starts up, the application analyses the files in these folders and, if they fulfil the requirements analysed below, they are “initialised” and made available where intended.
To view the active plugins go to the Tools menu -> Admin and in the “Customisation” box click on “forms, plugins and reports”.
By clicking the “reload plugins” button you can compel a recheck, and load any new forms without having to restart the Twproject service.

How it works
Loading: At start-up, Twproject invokes the initialise method in the detected jsp, and loads the list of available plugins into memory.
Visibility: a plugin may appear in the following contexts: in “Tools” menu, on the project editor and on the resource editor. Their display is subject to the conditions implemented in the “isVisible” method in the forms jsp file (see following paragraphs).
Persistence: Where are data saved and how? Since by definition the fields of a form are arbitrary, its data are not subject to referential integrity. All data are saved in the olpl_des_data and olpl_des_data_value tables, but the developer does not have to do anything about their persistence; in fact, the fields on the form will be saved by the framework and automatically hooked into the project/resource to which they refer.
Specifically, the referenceId column of the olpl_des_data table contains the id of the project, the referenceClassName column is the name of the class to which the form is attached (Task in the example) and the designerName column is the name of the form (corresponding to the name of the jsp file).
Plugin analysis
And now it is time to move on to the actual code, the trickiest and most fun part…
To get started, we recommend using simpleCustomForm.jsp: it is a well commented file with different types of fields (strings, dates, numbers, input files).
Copy the file into your customisation folder and start editing it by adding or removing fields as required. To check the interface for the changes you have made, remember to click on the “reload plugins” button on the “forms, plugins and reports” page (please note that if the form does not appear in the list, it means that it contains some error in the code that is blocking the loading).
Let’s have a look at the code (extracted from simpleCustomForm.jsp).
Each form has a rigid structure and must extend the abstract CustomForm class

The abstract class mandatorily requires the implementation of two methods
public boolean isVisible(RestState restState) {....

public LinkedHashMap<String, DesignerField> getDesignerFields (RestState restState){...
The first is used to indicate the conditions under which the form is to be displayed:

This method, based on the data obtained from the page state (RestState and primarily from “mainObject” field) checks that the context is appropriate.
In this case we are checking whether the mainObject, i.e. the object of the edited form, is a project (Task.class) and that its name corresponds to “Twproject test form”. Only if both conditions are true will the form be visible.
The second method is the “heart” of the form and is where you define the data you want to insert, listing them as DesignerFields and specifying for each one the type of field you want: String, Date, Boolean, Integer, Currency, CodeValueList etc.
It is the DesignerFields that know how to handle saving, serialising and representing the data.

You can have a selector as a radio button or as a list
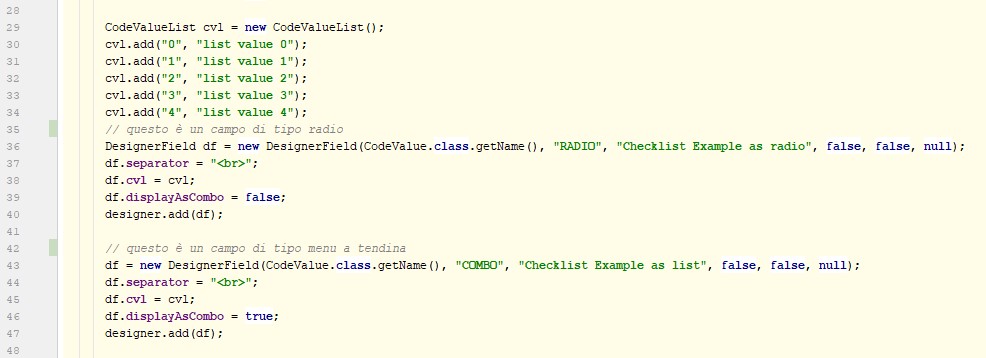
as a “short” text field or text area

numeric fields in different formats

input for the management of dates and times

fields for uploading files

lookup on the people table

or on that of projects

checkbox

drop-down menu whose values are the result of a query defined by you

multiple fields that can be freely added from the user interface
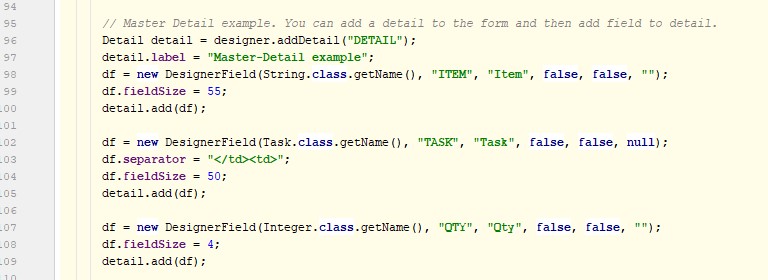
Note that once all fields have been defined, the method must perform a “return” of them
![]()
So far, we have analysed the structure of the inner class “PagePluginExt” which extends “CustomForm”.
Each customised form is then composed of two parts called at different times in the application’s life-cycle.
The first section is initialisation, invoked at the start of the service; it injects the form instance into the system, thus making it accessible.

In this case, we are creating a custom form in the “TASK_FORMS” group, so as to limit its display to the project section.
Twproject uses four groups: “REPORTS”, “RESOURCE_FORMS”, “TASK_FORMS”, “TREND“:
– REPORTS: are transversal to the objects. and visible in the lists and project tabs, resources, documents, costs, worklog
– RESOURCE_FORMS: visible in the resource sheet only
– TASK_FORMS: visible in the project tab only
– TREND: so far visible in the project tab only (still under development)
Please note that the fact that Twproject “invokes” plugins in these groups, however, does not imply that they are actually displayed; it depends on the conditions implemented in the isVisible(ResState resState) method of each plugin!
The last section is the html formatting of the form, preceded by a standard block in which the objects indispensable for the form to function are instantiated

We know that in this context the main object is a project so we can use it to extract some data to enrich the form

and finally construct the HTML grid for displaying the form
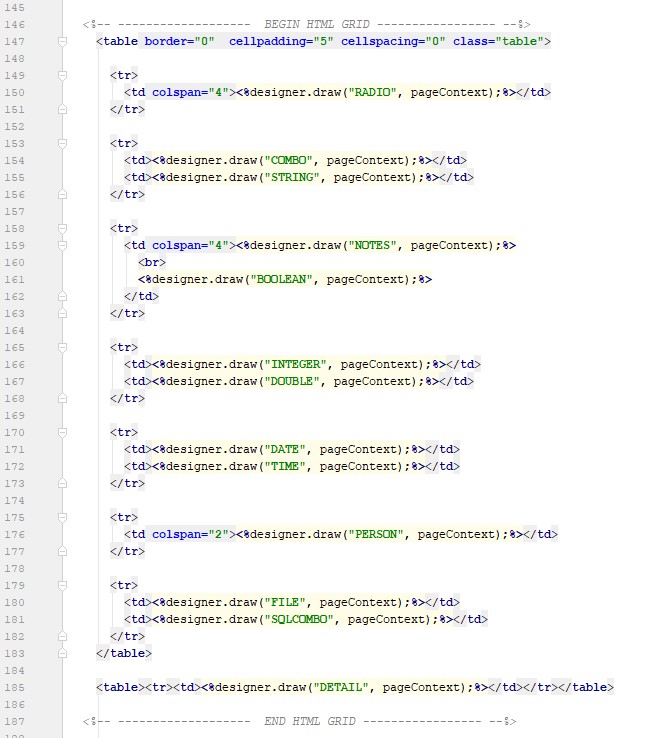
We can add some calculations on the entered values

The end result will be this interface
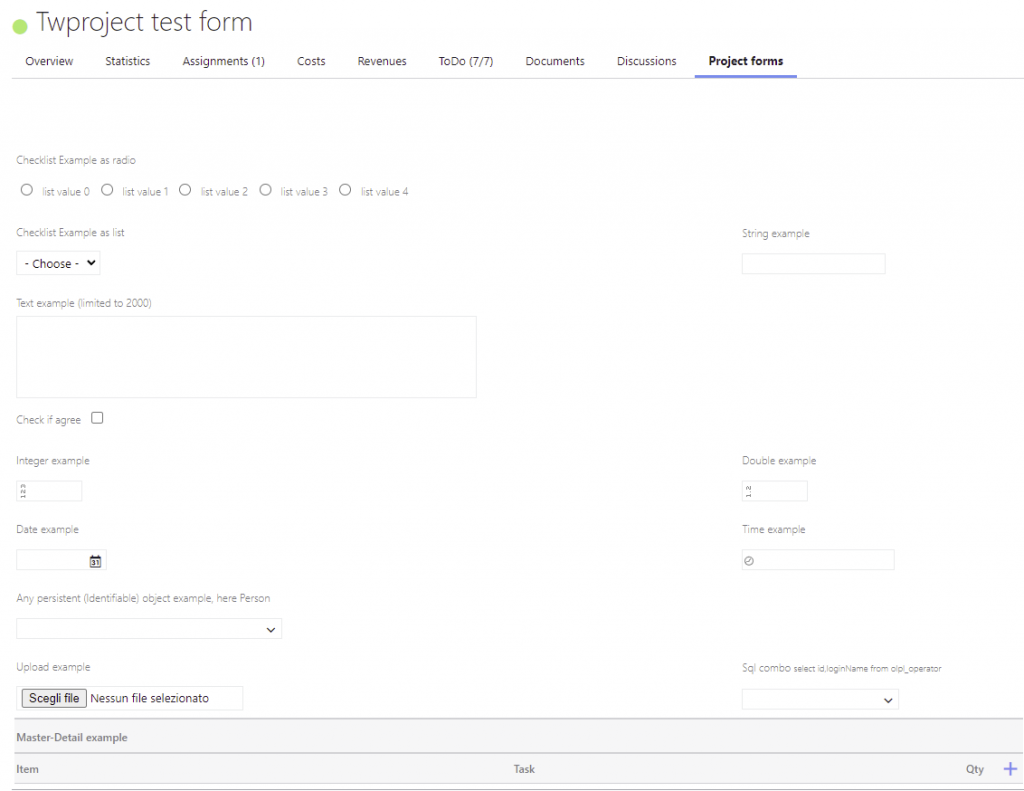
That’s all… the “print” and “save” buttons are added automatically!
Displaying a custom form in the Gantt chart
Since version 7.1.009 of Twproject, the possibility of loading forms of type TASK_FORMS has been introduced not only in the project form, as illustrated here, but also in its Gantt view.

This allows them to be compiled more quickly, as they can be managed, at the different stages in which a project is organised, from a single screen.
Due to the strictly grid-based structure, not all field types can be displayed, but only the more standard ones, such as dates, strings, numbers, checkboxes, drop-down selection, calculated fields.
For the guide on how to create a customised form for Twproject versions prior to 7.1.009 follow this link
Create your customised form >>