HTTP Server / File System
The first two links will lead to the same configuration page:
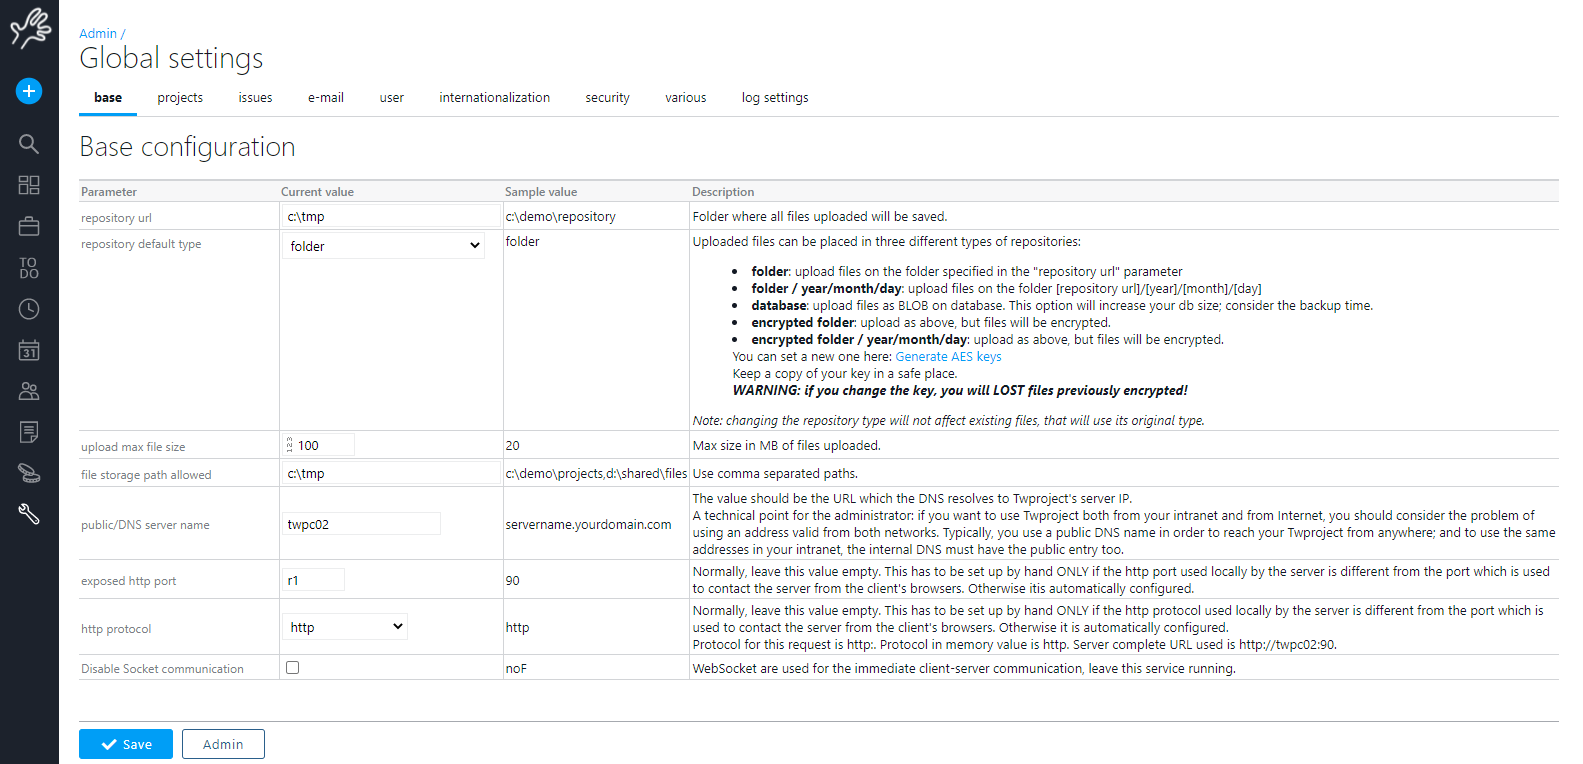
First three lines are use to define paths. Parameters have a detailed description. The third parameter: “file storages paths allowed”, is intended to allow administrators to limit the creation of file storages starting with specified paths.
The following parameters are used for configuring how user access Twproject through the network. Proxy, firewall, https, NATting may make things incredibly complex in large organizations, but Twproject gives a good support, notice https.
Security policies
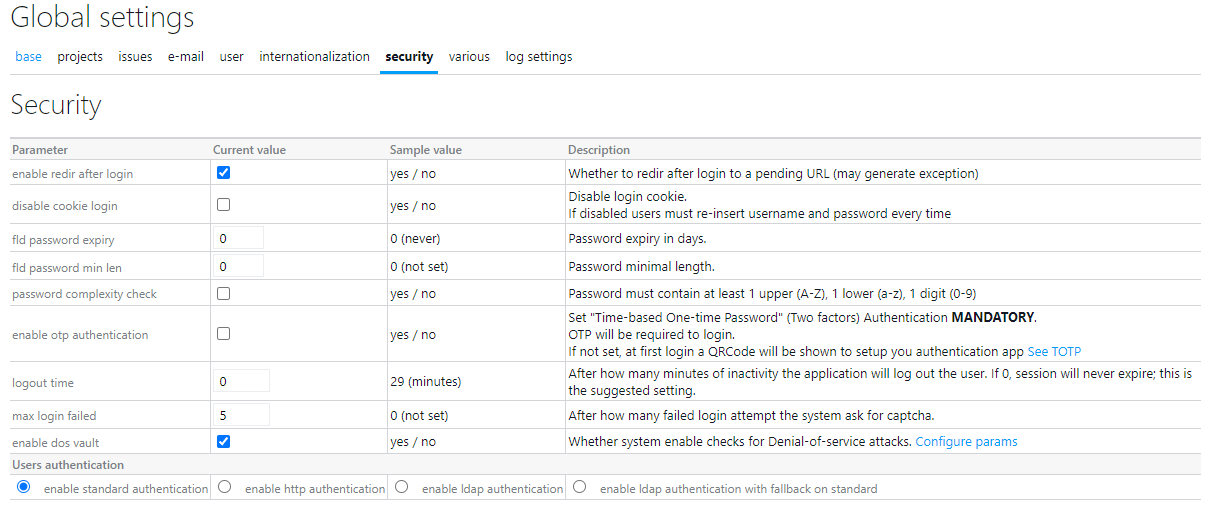
you can define Twproject’ password, lenght, complexity and security policies.
Multi-factor authentication: Time-based one time password (T-OTP)
Checking “enable otp authentication” users will be enforced to setup its T-OTP app at the first login.
T-OTP authentication consists on insert a one-time password (OTP) after your login name and password. This OTP is a pseudo-random number generated by an authentication app (e.g.: Google authenticator) installed on you mobile.
This number is based on current time and a secret code that is stored on your authentication app; usually such code is inserted by scanning e QR Code using the authentication app. This number changes every minute, so your mobile phone date and time MUST be set correctly, otherwise you cannot validate the OTP.
At first login, after login name and password has been inserted, you have to setup T-OTP app.
Install your preferred T-OTP authentication app (e.g.: Google authenticator) and open it. Follow the app instructions to create a new login (usually just click on a + button) and the scan the the QR Code:
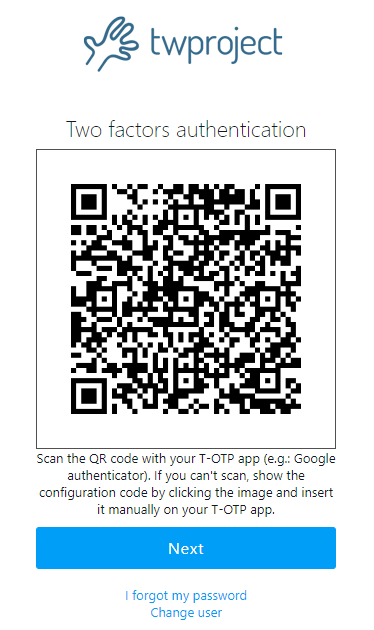
If you cannot scan the QR Code using the camera, for example because you are using Twproject mobile for the first login, you can insert it manually on your T-OTP app. Just click on QR and the code will be show:
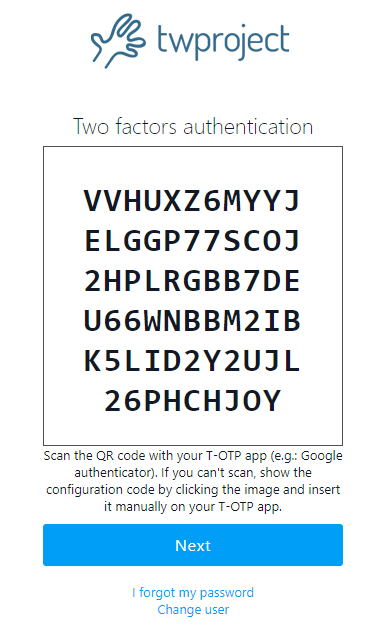
Click again and the code will be on your clipboard.
Then save the new login on you authentication app.
Click next and insert the generated code:
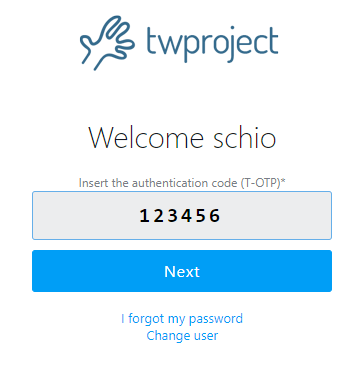
If the code matches the T-OTP authentication will be activated.
Every time you will log-in you will be requested to inserted the OTP code.
Users can reset the T-OTP key from their security panel on resource editor.
LDAP Authentication
Following “Ldap integration” link:

Twproject supports three different types of authentication:
Standard authentication
In this case users and passwords are managed by Twproject; it’s the default after setup.
Twproject does not store the real password but only an hash, so you can only reset a password but not recovery it.
The login screen is supplied by Twproject.
Http authentication
This means that the authentication is provided by the container (by default, Tomcat).
In this case Tomcat checks user credentials (eventually by a SSO) and then passes the authenticated user name to Twproject.
Twproject will get the authenticated user from the container context, search by its login name in its people list, and if the user is found and is an enabled one, it will not ask to login again in Twproject.
So users MUST be present on Twproject; in this case, Twproject passwords are not used.
The login screen is supplied by the container.
For example, the distributed Tomcat has commented out in the server xml file various sources of authentication, JDBC, JNDI (and hence LDAP), memory etc..
Details are in the container documentation, for example
http://tomcat.apache.org/tomcat-6.0-doc/realm-howto.html
LDAP authentication / with fallback

In this case Twproject will check user credentials with an LDAP server.
User credential are validated on a LDAP server and if validation goes well Twproject checks if the user is in its archives and enabled, otherwise it will perform a standard authentication.
Login screen is supplied by Twproject.
Notice that users’ rights in Twproject and in LDAP are totally disconnected.
You can eventually import and/or schedule synchronization with an LDAP/AD server
By selecting “enable ldap auth.” you will have to configure connection parameters. Go to section LDAP/Active Directory for details.
If you enable the fallback, failed LDAP authentication will fallback to Twproject’s, giving access to Twproject in any case.
Twproject e-mail
E-mail flow can go in two directions: from Twproject to the users, and from users to Twproject. Different configurations are needed for the two directions; you may activate one and not the other, at your choice. Of course having both directions is the ideal situation.
For all configurations, log in with administrator rights and go to admin page and follow the e-mail configuration link:

Configuration of e-mail from Twproject to users
This is quite simple, as it amounts to configuring “send e-mail” from the server where Twproject is installed. This consists in setting an SMTP server, and an e-mail from which e-mails will be sent. These two parameters are all is generally needed to set up send e-mail from Twproject.
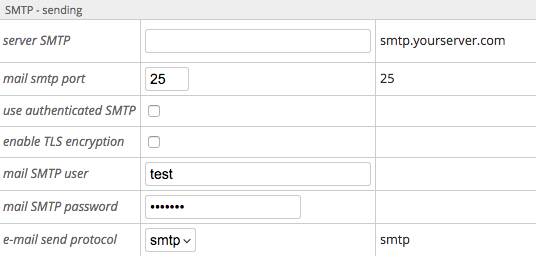
In case you use “authenticated SMTP”, a bit more parameters may be needed.
This done, users will receive e-mail only if they have an e-mail address set on their profile:
Configuration of e-mail from users to Twproject
In this direction, you have to create a new e-mail account, which will be used (exclusively) by Twproject: Twproject will connect to such account, and download and parse e-mail, just like your local e-mail client does.
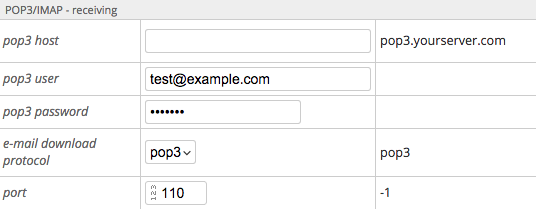
All configurations are extensively commented on the interface, which on save will also test the accessibility of the e-mail account.
In order to make this feature running you must configure it AND the e-mail downloader scheduler must is running. To check follow the “verify that downloader is running: e-mail downloader” link.
Using Gmail as SMTP and POP3 (IMAP) server
You can use Google’s Gmail service to receive and send e-mail from Twproject.
You absolutely must use a NEW Gmail account for your Twproject.
Here is an example configuration to use Gmail as server:
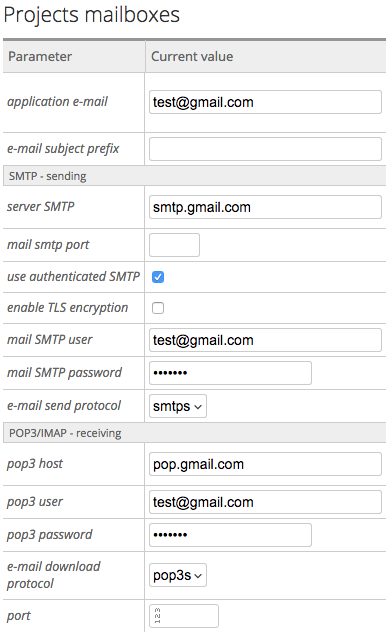
Notice that for SMTP, smtps is used, and for pop3, pop3s is used.
Imap support is currently experimental: To connect to Gmail using the IMAP protocol instead of the POP3 protocol, simply change the host name “pop.gmail.com” to “imap.gmail.com” and change the protocol name “pop3s” to “imaps” in the above instructions.
Maintenance: Google Gmail engine will keep all messages available in the web interface, even when Java API has downloaded and “deleted” them from the inbox. This is nice because it is a backup, but you may get really a lot of e-mail in there, so maybe clear it once in a while.
Debugging e-mail configuration
To test sending e-mail from Twproject to the clients – do these tests sequentially:
– check that you’ve set an SMTP server
– check that you’ve set an e-mail on your resources/users
– a simple way to test that it works is by doing a “send message” from docs&tools -> send message and checking “e-mail
– check that the scheduler is running (admin -> monitoring -> scheduler monitor)
– if your aim is to send appointments to you e-mail client, check that in your user options you have checked “send appointments to my e-mail client”
For errors check the email log in WEB-INF/log/email.log
To test receiving e-mail from clients in Twproject – do these tests sequentially:
– check that you’ve set and checked a POP server
– check that you’ve set unique e-mails on your resources/users
– check that the scheduler is running (admin -> monitoring -> scheduler monitor)
For errors check the email log in WEB-INF/log/email.log
Customizing e-mail
You can customize the e-mail subject prefix by going to admin -> configure SMTP -> e-mail subject prefix.
In the case of assignment notifications, this get combined with the labels
ASSIGNMENT_NOTIFICATION
And
ASSIG_AS
Which you can change in the label editor.
Language, dates, currency
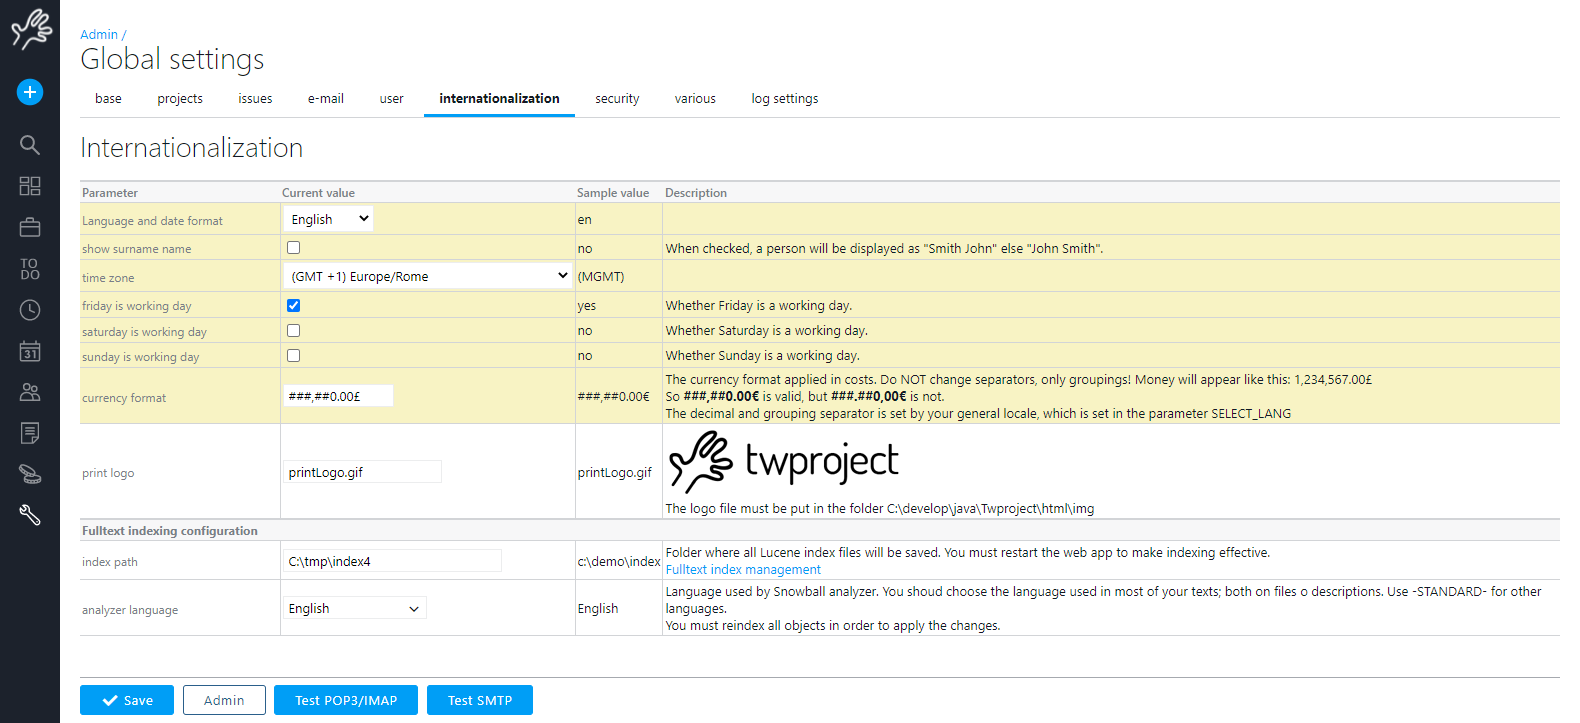
Here you can define the default interface language (every user can then pick a different one).
You can set some holidays, currency, date and time formats.
You can customize you reports by changing Twproject logo. Insert here a new file name and copy the file in the suggested folder.